First steps
- ⚠️ You’ll need Jira Site administrator permissions for these tasks.
- Follow the below steps to set it up to give the employees in your company a great experience.
- Subscribe to Time Sloth in Atlassian Marketplace
Subscribe and install Time Sloth application from Atlassian Marketplace. Make sure that the Time Sloth application is available in the Manage apps menu. After that the Time Sloth appears in the Apps menu Your apps section. - Start configuration as Site Admin
When you install Time Sloth, every Jira site admin has permission to configure the application. Other Jira software users haven’t access to it until the configuration. - Set Company settings
During the configuration first of all you can set the company settings, which includes some general topics, such as:
- Date and time: You can select your timezone and date format. The dates in the application are displayed everywhere according to the selected format. You can set the week to start on Sunday or Monday.
- Approvals and budgets:
– Application admin: by default, the person performing the configuration is selected, but any of the site admins can be set to be the approver
– Leave type to be approved: basically the holiday leave type appears to be approved. You can set which type of leave (holiday/ sick leave/ unpaid leave) to be approved in your company.
– Default yearly holiday budget: the default holiday value, which is set for all users. Custom holiday budgets can be set later in the configuration process. - Holiday scheme
– Predefined holiday scheme: you can select the country whose official holidays apply to your company. These days don’t count as working days, so the holidays requested for these days don’t reduce the users’ holiday budgets.
– Days off: the official holidays of the previously selected country. You can add more extra days off with the Add new button, which will apply to your company.
– Extra working days: you can add extra working days with the Add new button. These days count as working days, so the holidays requested for these days reduce the users’ holiday budgets. - Notifications
– Accepted/Declined requests 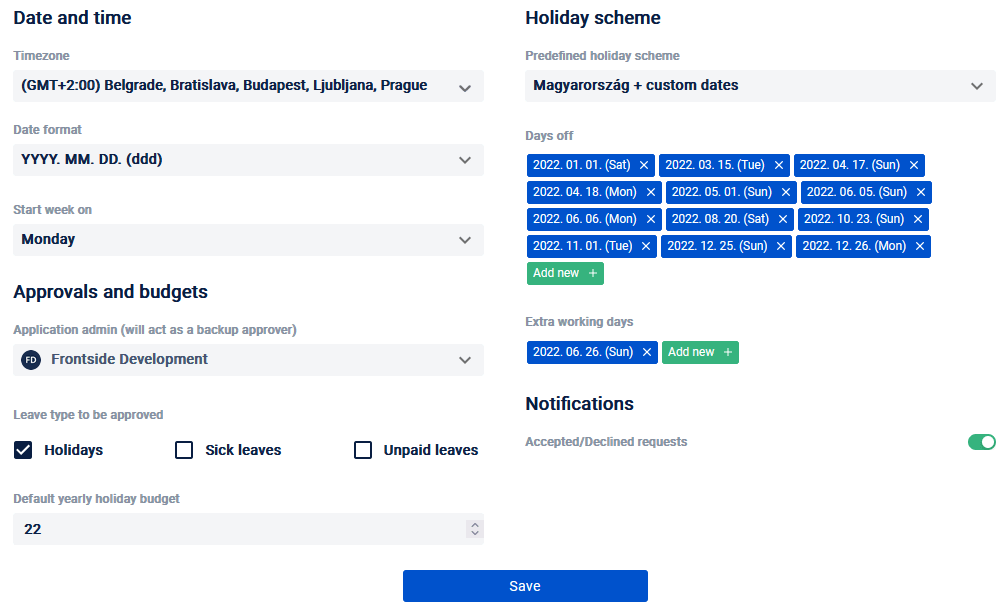
- Set Users’ details
After the company settings you have to check the users’ details. The list of users shows the users who also have access to your own Jira System. The users who are Jira Site admins on the Jira System basically have admin privileges on this interface. You can set the user to have a manager, who must approve the leave requests. Furthermore you can define the title, assign the user to a team, and give to the user admin rights and access to Time Slot application.
- Set Users’ holiday budgets
On the Holiday budgets interface you can set the actual and next year holiday budgets per user. The default value is what you set on the company settings page default yearly holiday budget section. The value must not be less than zero and more than two hundred. Completing this step will take you back to the main calendar screen.
You’re all set! Everyone you set to “Active” can access Time Sloth via their Jira Apps menu.
- ℹ️ Note: You can change all of these settings anytime after initial configuration
3. Types of leave in Time Sloth
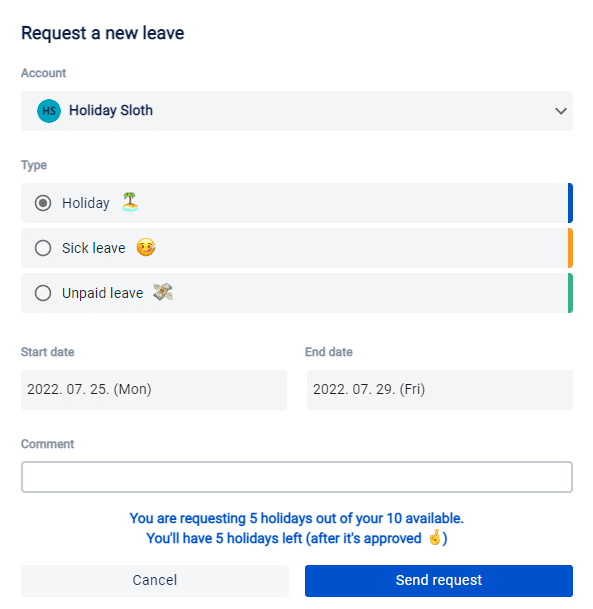
Holiday
Holidays that can be used from the annual holiday limit specified by the Admin.
If you have used up your full leave, you cannot record more claims for this type of leave. As Admin you can be set to automatically display the recorded request as an approved leave or as a pending leave request.
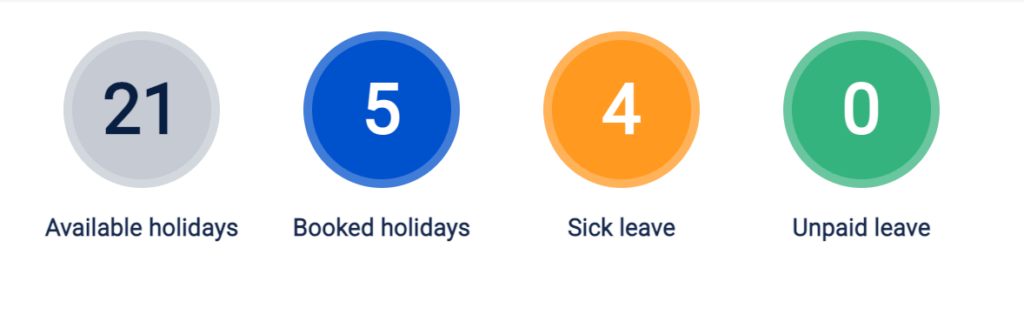
Sick leave
For times when you can’t make it to work due to sudden illness or just being under the weather. This type of leave can be claimed without restriction. As an Admin you can be set to automatically display the recorded request as an approved leave or as a pending leave request.
Unpaid leave
In case you run out of your holiday budget, or you don’t want to use it for whatever reason… (keep in mind that depending on the employment laws of your country, you will most likely not receive any compensation for this type of time off!). This type of leave can be claimed without restriction. As an Admin you can be set to automatically display the recorded request as an approved leave or as a pending leave request.
5. Approve / Decline request
As an Admin you can set auto approval on any type of leave request, these will not require an approval from the managers/admins.
⚠️ You’ll need Admin/Manager rights for the next steps
As a manager you can only approve requests from your managee’s.
As an Admin you can manage all the requests raised by users of your organization.
Approving request on the notification view
On the notification page you can see the list of pending requests in the Requests waiting for your approval section which you can approve or decline.
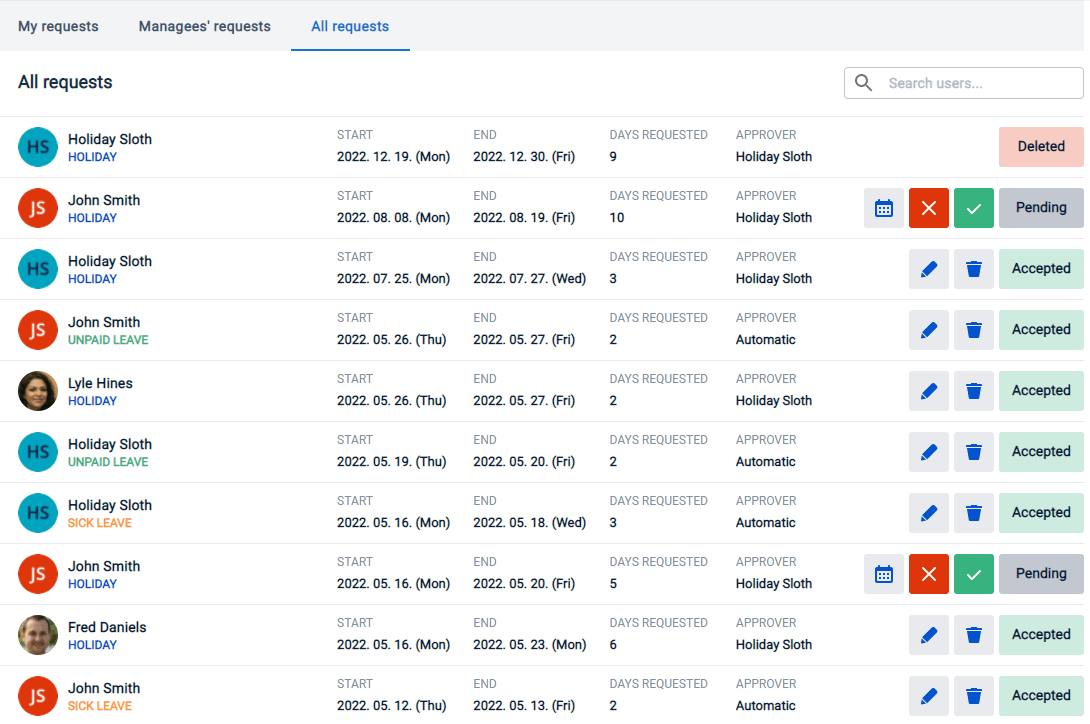
Approving request on requests view
On the requests page you can switch to Managee’s requests tab to handle requests from you direct reports. Here you can see the approval section where you can approve or decline the requests.
As an Admin you can switch to the All requests tab where you can see requests from all users within your organization and choose to approve or deny the requests.
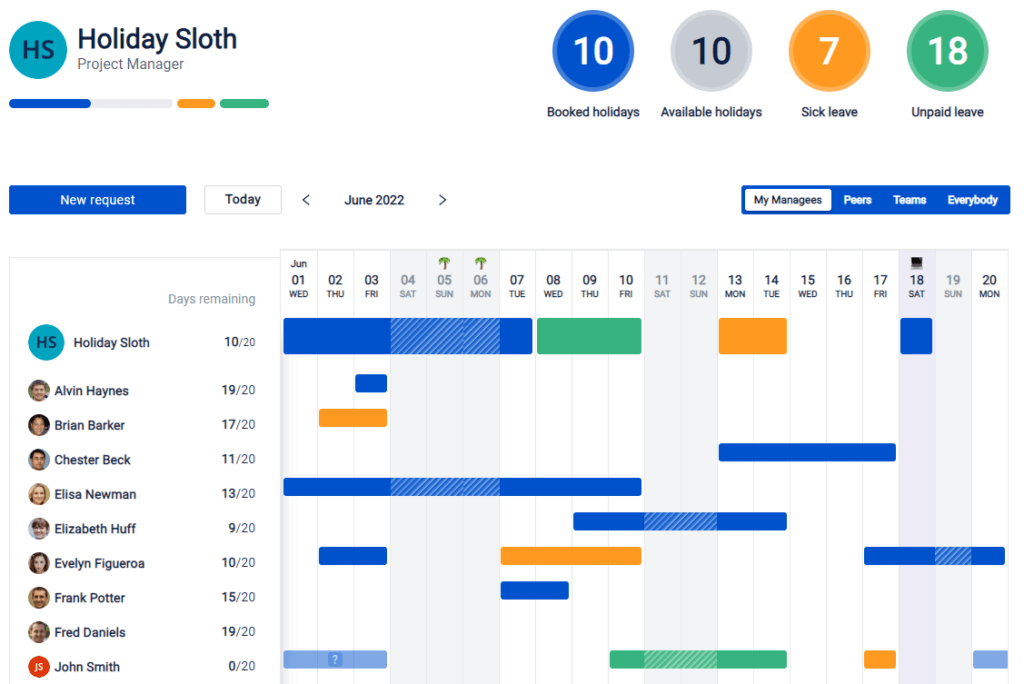
Approving request on the calendar view
On the calendar you can click on any of your managee’s pending requests and approve or decline it individually.
As an Admin you can manage all the requests from all users within your organization.
When you successfully approve/decline a request a notification message appears about this.
The users will also be notified if you approve/decline their requests with a pop-up message.
8. Synchronize new users in Time Sloth
⚠️ To synchronize new users in Time Sloth, you need to have the Admin rights.
When a new user is added to your Jira system, a warning message will appear on the Time Sloth User management settings interface. This means that you have the option to sync the new user to the Time Sloth application so that the new user can also access the application. The notification shows how many users are waiting to sync. After clicking the Show unsynced user button, you can set the data for the new users one by one. In the panel you can enter the data known on the user management page:
- Manager: you can choose from any user with access to the Time Sloth application.
- Title: you can enter a new one or choose from a title already used in the Time Sloth application
- Team: you can enter a new one or choose from a team already used in the Time Sloth application
- Yearly holiday budget: the value of the current and next year leave budget
- Active status: as an active user, the user is authorized to use the Time Sloth application
- Admin status: as an administrator, the user can edit the settings.
You can save the details with the Save and set up the next user button or you can skip the current user synchronization with the Skip now button. After the synchronization the user shows in the list with the set data.